How to Screenshot on an ASUS Laptop -In the digital age, capturing moments on your computer screen has become an essential skill. Whether you’re sharing an interesting article, creating tutorials, or troubleshooting technical issues, taking screenshots is a quick and effective way to communicate visually.
If you’re an ASUS laptop user running Windows 10, you’re in luck! In this guide, we’ll walk you through various methods to take screenshots effortlessly.
Method 1: Snipping Tool
Windows 10 comes equipped with the Snipping Tool, a built-in utility that allows you to capture specific parts of your screen. Here’s how to use it:
Open the Snipping Tool: Type “Snipping Tool” into the Windows search bar and click on the app when it appears.
Choose a Snip Type: In the Snipping Tool window, click on “New.” You’ll have four options: Free-form Snip, Rectangular Snip, Window Snip, and Full-screen Snip. Select the one that suits your needs.
Capture the Screen: Depending on the snip type you’ve chosen, follow the instructions to capture the desired area. For instance, with the “Rectangular Snip,” you’ll need to drag the cursor to form a rectangle around the area you want to capture.
Annotate (Optional): The Snipping Tool offers basic annotation tools that allow you to draw, highlight, and add notes to your screenshot.
Save and Share: Once you’re satisfied with your snip, click on the “File” menu and choose “Save As” to save the screenshot to your preferred location.
Method 2: Snip & Sketch
Snip & Sketch is another screenshot tool included in Windows 10, offering more advanced features than the Snipping Tool:
Access Snip & Sketch: Type “Snip & Sketch” into the Windows search bar and open the app.
Take a Screenshot: Click on the “New” button located at the top-left corner of the app window. You can choose from options like “Rectangular Snip,” “Freeform Snip,” “Window Snip,” or even “Fullscreen Snip.”
Annotate and Edit: After taking the screenshot, Snip & Sketch allows you to annotate, draw, crop, and even add text to your screenshot.
Save and Share: Once you’ve made the necessary edits, click on the floppy disk icon (Save) to save your screenshot. You can also directly share it from the app using the share icon.
Method 3: Windows Key + Print Screen
For a quick and easy way to capture your entire screen, use the Windows Key + Print Screen shortcut:
Capture the Screen: Press the “Windows” key and the “Print Screen” key simultaneously. The screen will dim briefly, indicating that a screenshot has been taken.
Locate the Screenshot: The screenshot is automatically saved to your “Screenshots” folder within the “Pictures” library.
Method 4: Windows Key + Shift + S
An even quicker way to capture a specific area of your screen is by using the Windows Key + Shift + S shortcut:
Capture the Area: Press the “Windows” key, “Shift,” and “S” simultaneously. Your screen will fade, and you’ll be able to select the area you want to capture using your cursor.
Annotate and Share (Optional): Once the screenshot is captured, a small notification will appear at the bottom-right corner of your screen. You can click on it to annotate the screenshot or share it immediately.
Capturing moments on your ASUS laptop running Windows 10 has never been easier. Whether you opt for the Snipping Tool, Snip & Sketch, or keyboard shortcuts, these methods will help you effectively communicate and share your screen content with others. So go ahead, capture and share away!
Method 5:The Screenshot on an Asus laptop with Snip Editor
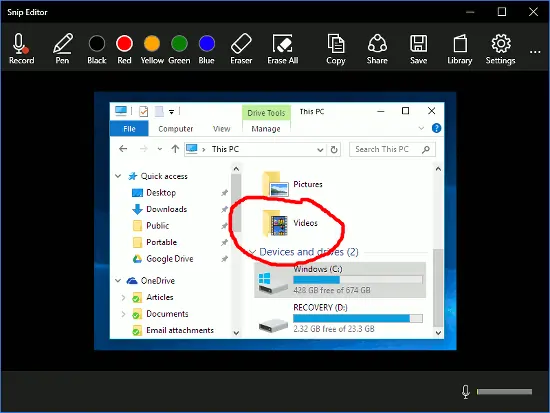
Snip Editor, also known as Microsoft Snip, represents a Microsoft Garage initiative that offers improved functionality compared to the standard Cut tool, in my opinion.
The Snip Editor enables you to swiftly capture screenshots of your whole screen, the currently active window, or a manually selected rectangular area. Furthermore, you have the option to assign the PrtScn key as a shortcut for accessing the Snip Editor’s screenshot functionality.
The application also offers several methods for annotating screenshots, such as flexible pen options (ideal for enthusiasts of Windows Ink) and the ability to include audio recordings.
Similar to the Snipping Tool, Snip Editor allows you to delay the capturing of screenshots by up to 5 seconds. This feature enables you to take snapshots of transient elements like disappearing menus and tooltips.
The Snip Editor enables swift screenshot capture of the whole screen, currently active window, or user-defined rectangular area. Moreover, it offers the option to assign the PrtScn key as a shortcut for accessing the Snip Editor screenshot tool.
Snip Editor offers a range of free pen choices, perfect for enthusiasts of Windows Ink, along with the ability to record sound. Similar to the Snipping Tool, this tool enables you to delay the capture of screenshots for a maximum of 5 seconds. This feature proves handy for taking snapshots of transient menus and tooltips that might otherwise disappear.
Method 6:Schirmfoto
The application offers several benefits, including the capability to save high-resolution screenshots and a range of format options like JPG, PNG, and PDF.
The screenshot application installed on this laptop offers the capability to capture video displays present on the screen. In addition to this, it provides various editing functions including cropping, printing, as well as the ability to incorporate elements like watermarks and markers, among others.
It has an extremely compact size of merely 5MB and is compatible with Windows XP, Windows 7, Windows 8, and Windows 10 operating systems.
To utilize this application, all you need to do is click on the camera icon, and the application will automatically save the image for you. Additionally, Schirmfoto provides the capability to capture the image of your choice.
Method 7:Jing

The features and tools offered by Jing applications closely resemble those of other screenshot applications, with minimal differences.
In addition, the software offers a feature to capture the on-screen activity for a duration of 5 minutes. This can be done effortlessly by navigating to the “Capture Video” option within the Menu. It’s important to note that only PNG format is supported for saving images.
Read more:
Method 8:Lightshot
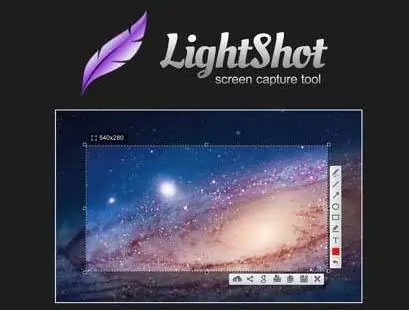
Ensure that you have installed the application to easily utilize its screenshot function. Once installed, the Lightshot icon will be visible in the Windows taskbar.
To proceed, choose the screen display or image you wish to capture in a screenshot. Then, locate the Lightshot icon on the Taskbar menu and click on it. Next, select the specific area you want to capture by using your laptop’s mouse.
Once you’ve chosen the image, proceed to save it by clicking on the diskette icon or logo. Ensure that you save it in one of the specified formats: PNG, JPEG, or BMP.
The software offers several supplementary functions including the options to share, print, copy, add text, provide markers, and more. Despite its compact size of just 4MB, it is compatible with Windows XP, Windows 7, Windows 8, and Macintosh operating systems.
Method 9:The Screenshot on Asus Laptop with Windows Logo Key + Volume Down
If you give the Windows Surface device a gentle shake, you’ll be able to utilize its quasi-physical buttons to capture full-screen screenshots, much like the process of taking screenshots on smartphones or other tablets.
To accomplish this task, simply press and hold the Windows Logo touch button located at the bottom of your Surface screen, and simultaneously press the physical volume-down button situated on the side of the tablet.
The display will momentarily reduce in brightness, and the system will automatically save screenshots to the “Pictures > Screenshots” directory.
Conclusion:
Greetings, friends! The aforementioned methods outline various approaches to capturing screenshots on an Asus laptop running Windows 10. I trust that this guide will prove invaluable in facilitating your screenshot-taking endeavors. Should any inquiries arise pertaining to the content of this article, please feel free to leave a comment below, and rest assured, we will promptly respond.
Remember to bookmark this page and make it a part of your daily routine to visit Digitaltechnobox.com . This platform offers an array of contemporary technological insights, including comprehensive how-to tutorials, insightful tips and techniques, discussions on blogging, digital marketing insights, Windows and Android optimization, root procedures, insights into social media trends, gaming updates, and much more. Wishing you the best of luck on your journey ahead!